Public Math Laundromat
This post documents the process of how Math at the Laundromat was developed and implemented. I hope that detailing the process will shed light on how you can start Public Math projects in your community. I cannot emphasize enough how important collaborating was throughout this entire process. No idea, design, etc. was designed in isolation, but always iterated, play tested, and critiqued by an awesome group of collaborators. A special thank you goes to Dan Finkel (mathforlove.com) who graciously shared his designs with us.
Step 1) Find a partner in the community
William is a friend of mine from church who owns a Mr. Bubble, a laundromat in Chicago. I asked if he would be willing to mathematize his laundromat. I showed him photos from my visit to Math on a Stick as well as designs by Math Anywhere (having proof of concepts were essential) to give him a sense of what I was talking about. Without knowing exactly what this was going to look like, he agreed.
Step 2) Generate more ideas than are useful
I visited Mr. Bubble with William to learn more about his point of view. I asked him a lot of questions to learn more about the laundromat - “Where do your customers spend most of their time? What are they typically doing there? What do these symbols on the machine stand for? What are the numbers on the machines about?” Then, I began mixing in ideas that came into my head. It didn’t matter if I thought the idea was good, bad, feasible, or unrealistic. His reactions allowed me to get a sense of what he liked/disliked, what would be allowed in his space, and how he imagined his customers would interact.
During my visit, I took a lot of photos - more than I felt necessary. I hoped that while looking at them later, something I had not noticed before would provide insight for a design.
Step 3) Marinate
Photos and ideas were shared with other people collaborating on this project. The issue was, every idea seemed pretty great, so it was hard to know what really deserved to be pursued. The only thing I could say was necessary during this step was time. I think stewing on ideas with others eventually led to us feeling like some ideas had lasting power while others we naturally forgot about.
Step 4) Design
Some ideas began to emerge as more interesting. One of those ideas was merging Dan Finkel’s Prime Climb design into the numbering on the machines. I emailed Dan who was super generous in his sharing of his designs (as I find most people in the education community to be) and got to work!
Important mini-step: prototype! Very early on, I showed William a prototype of the sticker and he approved, had he disapproved, it would be back to the drawing board.
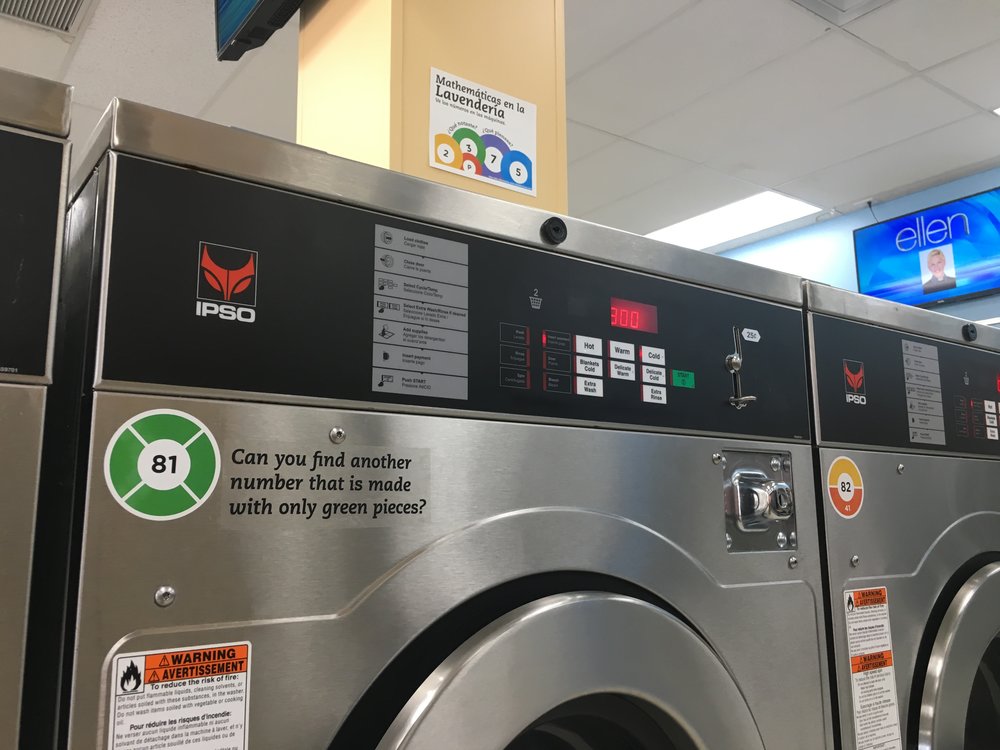
It was then a matter of resizing and printing the stickers on Avery 2.5 in circle labels. They’re $9 for 25 sheets with 12 stickers per sheet (you do the math). Collaborators then helped shape the questions that would be next to some (not too many) of the numbers.
Step 5) Install and Document
I met William at the Laundromat with everything printed. He was kind enough to help do the nail-damaging work of peeling and sticking stickers, but we were in a celebratory mood! We had an idea in our heads and were able to make it a reality. After installing, we realized that even more math at Mr. Bubble might feel a little suffocating and distract from the goodness that exists in prime climb, so he suggested using another idea that we have (hint: they’re all about socks) at his other laundromat. I found the next steps conversations was really natural to have because the installation piece had a lot of positive energy.
Dan Finkel has been kind enough to allow us to share all of the designs for this project. You can find and download them here. Please reach out if you have any questions!
—
Chris Nho is a high school math teacher in San Diego.


